Using IntelliJ

Course Home | Official IntelliJ Docs | Project Repo
There are many Integrated Development Environments (IDEs) to choose from when it comes to developing in Java, but my preference is IntelliJ.
I say it’s my favourite, however, I’ve never tried the other main ones, which are Eclipse and NetBeans. I’ve never had any issues with IntelliJ.
Download and Install IntelliJ
You can download IntelliJ from JetBrains site. Just following their instructions to get it installed.
Download and Install Java
To be able to compile the Java applications you create, and I consider a suite of automated checks to be an application, you need to have the Java JDK installed. The current version, and what the code I share has been designed to work with is Java 8.
Just follow the instructions, and you can test it’s installed after by running ‘javac -version’ in a cmd/terminal window and you should get something like ‘javac 1.8.0_65’ back.
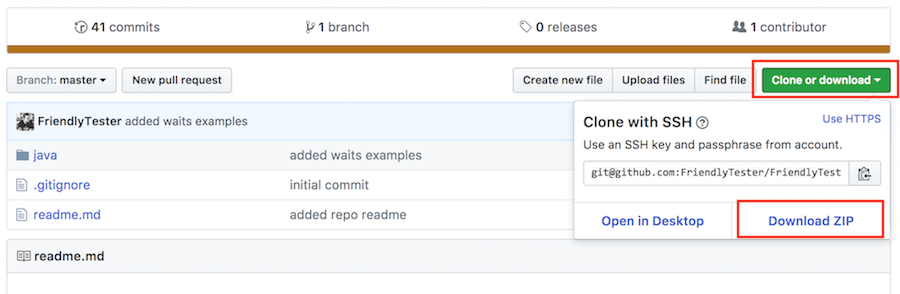
Downloading code from GitHub
The majority of people who share code online and at workshops tend to store their code in GitHub. So it’s certainly a site worth getting familiar with. As is git itself for that matter. Here is a great online tutorial for learning git, claims to take 15 mins.
With regard to my lessons, you just need to go the URL provided with the lesson and click ‘Download Zip’ from the green button. Then unzip somewhere.
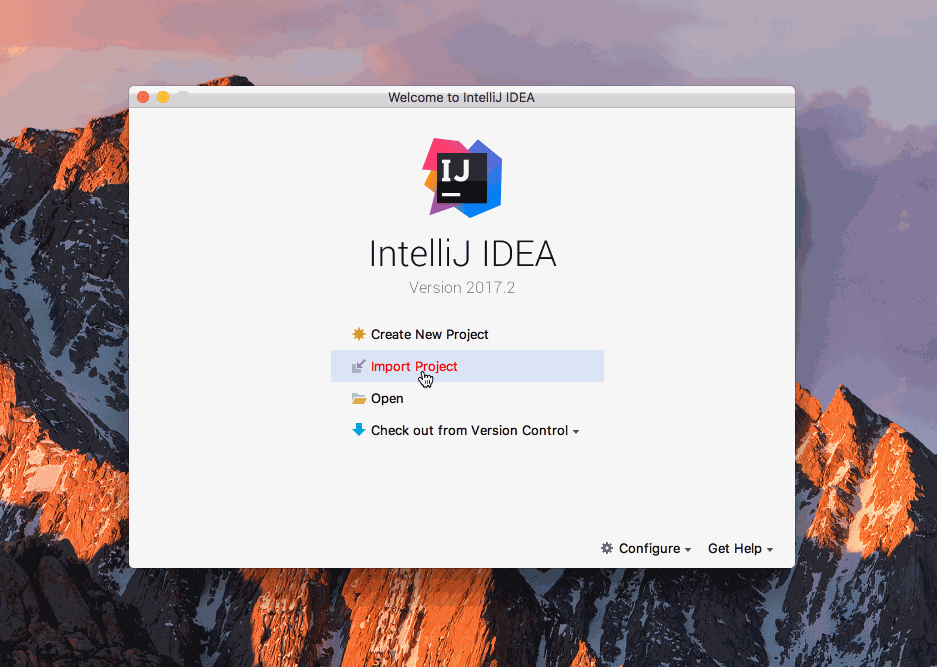
Importing a Project
The projects that I share all currently use Maven. Maven is project management tool. It allows us to manage and control our project. For beginners though, just think of it as the way we manage dependencies and run our tests from a command line. You can usually tell a Java project is using maven by the fact it will have a ‘pom.xml’ file. You can read more about Maven on their site.
To import a maven project, open IntelliJ, click ‘import project’, navigate to our ‘pom.xml’ file, check ‘Import maven projects automatically’. Once you have imported the pom.xml, select your JDK, give your project a name, choose a location and click finish.
Building a Project
There are numerous ways to compile your program:
- Within IntelliJ on the top nav bar select Build > Build Project
- Within IntelliJ, use keyboard shortcuts. If you are using a Mac the shortcut is
Cmd+F9. For WindowsCtrl+F9 - We can also use the command line as we’re using maven - use ‘mvn compile’
For both the options in IntelliJ, if you look down to the bottom right of the window, you’ll see a status message telling you that it is ‘building/compiling’ and depending on the size of the program, you may see a build progress bar.
Then in the bottom left you should see ‘Compilation completed successfully…’. If you see that message, your code compiled.
Project Window
This is where we navigate to our code base and where we can create new files. If you don’t see the project window, you can open it by going to View > Tool Windows > Project, or by pressing Cmd/Ctrl + 1.
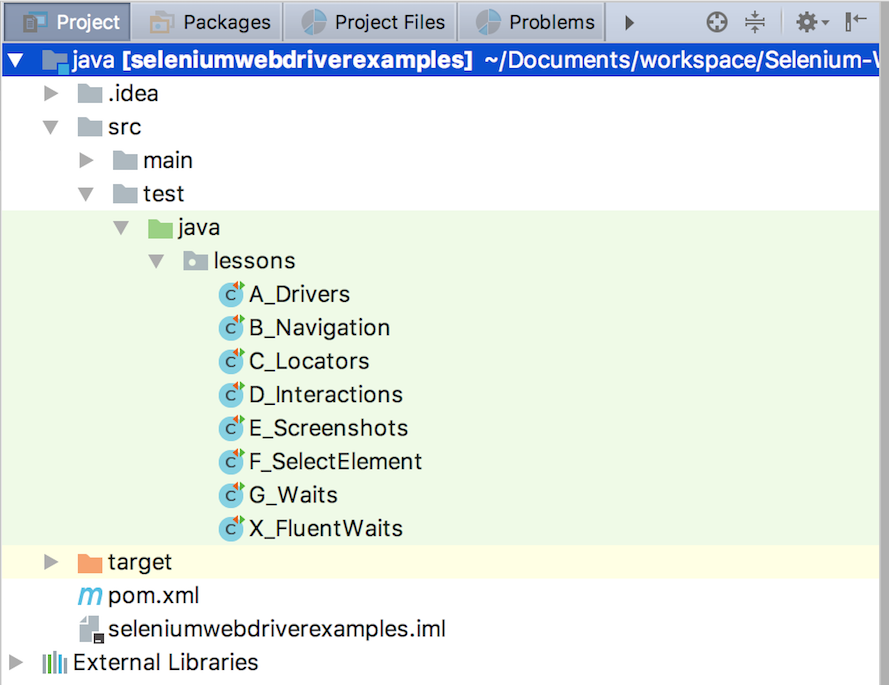
Right click on a file and select ‘New’ to create a new folder or file.
Running a Test
We can tell that a method is a test as it will have @Test above the method name. The easiest way to run that test is to right click inside the method and select ‘Run

Run Window
Another window you should get used to is the Run Window. This window will automatically appear when you run a test. Or if you want to access it, you can also get it from View > Tool Windows > Run or Cmd+4.
When you run a test, if your command has console logs, or the framework you are using has them, this is where they will appear.
If a test fails, this is where you should be looking for all the logs to see if you can work out what has gone wrong.

Comments